How to cycle faster.
Just recently I’ve in conversations about cycling with a few talking to a few friends and colleagues. Inevitably the topics of how to improve performance, speed and climbing hills always comes up. My answer to any of these questions is that one should focus on spin rate rather than speed.
My antidotal case in point is John (not his real name). John was super fit. He was on a national ski team. On Sundays we’d go out for a group ride which varied in distance between 100 and 170km. When John first started riding with the group he’d get to about 100 to 120km in and then he’d be dropped. After watching this play out for a few weeks I asked him, what was going on. After all, he was the fittest and strongest guy in the group. He’s answer was, he got tired and lost all power at about that distance. I offered to watch how he was riding and maybe coach him a bit too which he agreed. During the ride, I observed his low spin rates and choice of very large gears. I came up side him and commented, now I see why you’re getting blown out, you need to use your fitness by increasing your spin and decreasing your gear ratio.
I figured he could comfortably spin at about 110 and so I offered tips that lead him in that direction. In context, I’ve watched track riders spin at ~200 RPMs for short bursts of 2 minutes or so. I now jokingly say, offering this advice was the biggest mistake I could have made. Once he got used to spinning at 100+, he was almost impossible to keep up with. I say “almost” only because he was nice enough not to drop me even though he easily could have. I remember once we got entangled in a eratic group of riders. Fearing a crash, we when we plotted on how to drop the entire group on an upcoming short but rather steep climb up and escarpment (no downhill on the other side). The plan was, we’d go hard on the climb and I’d try to hang onto his wheel. We made our way to the front of the group arriving there just at the bottom of the climb. I stuck to his wheel and while he easily rolled over the top, it took me a minute or two to recover from the effort before we pushed on the gas again. Needless to say, we did achieve our goal of dropping the entire group.
The Math Behind the Advice
A bicycle is a simple machine in the classic sense (wheel and axle). You have a crank attached to one or more chain rings in the front and one or more cogs attached to the axle of a wheel in the back. Attached to the crank is an arm and attached to that is a pedal. Adding a chain allows the whole system to convert pressure on the pedal to forward momentum. Just how far and how fast is a combination of gear ratio and spin rates. For example, on my current bike I typically use a 44x15 on the flats. The bike at a 700c wheel size, or 622mm. Lets say adding the tire brings this up to about 700mm. This works out to a 2.2m (3.1415*0.7m) rollout distance. From this we know that that to travel 1km, the wheel need to rotate 454.5 times. That translates to 154.9 pedal rotations when using the gear combination of 44x15 gear ratio. If you spin at 60rpm, it will take 2m35s to travel 1km. If you spin at 90, that 1km will only take 1m43s. At 60rpms, speed is just over 23 km/hr whereas it is just under 35 at 90rpms.
44x15????
Where does 44x15 come from? This number combination tells us that the chain ring has 44 teeth and the cog has 15. Why is tooth count used? Because the size of the links in the chain need to match the size and spacing of the teeth on the sprocket. This allows the use teeth as a unit of measure for the diameter of the sprocket. In the pairing above, I can use the size to calculate a gear ratio by dividing the gear size in the front by the gear size in the back. This ratio represents the number of rotations the wheel completes for a single rotation of the crank. For our example, this is 44/15 which equals 2.93. Thus 1 turn of the pedals turns the wheel 2.93 times. Note that cog will have the number of teeth stamped on them. The cog in the image below is stamped with T14.
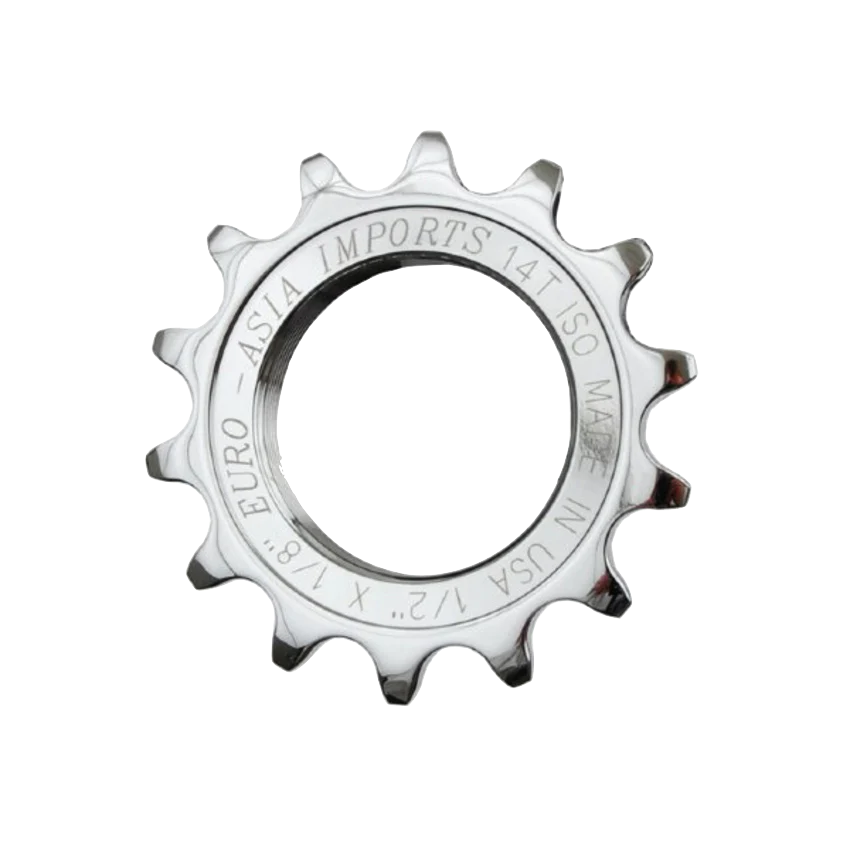
14 Tooth Cog
The table below lists all of the gear ratios on my bike.
| Gear Ratios | 22 | 32 | 44 |
|---|---|---|---|
| 34 | 0.647 | 0.941 | 1.294 |
| 30 | 0.733 | 1.067 | 1.467 |
| 26 | 0.846 | 1.231 | 1.692 |
| 23 | 0.957 | 1.391 | 1.913 |
| 20 | 1.100 | 1.600 | 2.200 |
| 18 | 1.222 | 1.778 | 2.444 |
| 15 | 1.467 | 2.133 | 2.933 |
| 13 | 1.692 | 2.462 | 3.385 |
| 11 | 2.000 | 2.909 | 4.000 |
As can seen by the numbers, there is a fairly even spread of choice and I can make meaningful adjustments that are not far away from the target gear ratio. For example, from the bottom of the climb on my most frequented route I’ll approach in my 44x15 but then drop to a 32x18 with one adjustment with each shifter as I start up the 7% grade. This is also a tool I would use when evaluating if a chain ring/cassette combination is going to work for me on a new bike. For example, I know that I can struggle up my favorite 15% grade with a 0.941 ratio but I’d much prefer to spin the 0.846 and if I don’t have it that day, I have the 0.647 at my disposal.
What about speed?
If we’re spinning a 44x15 at 90rpms and we want to or need to go faster, why can’t we just use a bigger gear ratio. For example, I could use my 44x13 and I’d realize a speed of slightly greater than 40km/hr. If only it were that easy because if you needed 262 watts of power to push 35, you’re going to need 366 to maintain 40. To put this into perspective, a pro cyclist is able to sustainably push 300+ watts (equates to 1100 calories/hr). For fun, a small car generally puts out 110000 watts of power whereas an F1 car is capable of 735500 watts. Note that the watts needed for a cyclist varies greatly as there are so many factors that can “steal” wattage from you. If you want an estimate that is more personalized than I’d recommend this excellent in depth look at power by Steve Gribble. Even this article omits many physical factors that will impact your performance.
The Art of Pedaling
It may seem odd to speak of pedaling and art but that is the best way to describe it. Why? The answer is, we all have slightly different body shapes and we each have our dominate side for pedaling. I’m left side dominate and the ratio of my upper body length to my inseam leaves the handle bars on an off the rack bike too close for comfort. To correct for this I have the seat farther back then it should be. From a bio-mechanical perspective, this changes the angle of my pedal stroke and that means I use my muscles differently than a “normal” person does. Of course I’m quite used to this less than optimal bike setup but do know, having a different stress on the body/muscles isn’t without its consequences.
The pedal stroke is broken down into different phases. Each phase is the result of the geometry caused by your leg pushing a disk in circles. The down stroke on the pedal is where about 85% of the energy is being transferred to the crank. Once you hit the bottom of the stroke you transition to the upstroke. If you are using cleats (highly recommended) then you’ll be able to transfer about 3% of power for the entire stroke. The closer you get back to the top of he stroke, the closer you are to the dead zone. An even pedal stroke should give you the feeling that your foot is being carried by the momentum of the crank. In other words, the foot is easily sliding over the top while you’re making adjustments for the next downstroke. With a well practiced pedal stroke, there should be as little movement as possible meaning the adjustments from the dead zone to the down stroke won’t be visible to anyone watching you from the waste up.
Undoubtedly the most important aspect to a good pedal stroke is how the seat is setup. Too low and you won’t be able to complete your down stroke which will reduce the amount of power you can apply. Nor will you be able to move smoothly through the dead spot which will also cost you power. On the other hand, having the seat too high will cause you to hyper-extend your leg which will likely cause your hips to rock back and forth. Aside from affecting your ability to deliver maximal power to the drive train, having the seat too high or too low will be uncomfortable on longer rides and can cause injuries. There is a huge benefit to getting a professional fitting.
What gear should you be using? Think of it this way, how many reps can you achieve when lifting 20kg as apposed to how many when lifting 1kg. With cycling you’ll be performing anywhere from 3000 to 5500 reps per hour. As my very fit friend discovered, it was much easier to perform many reps with a smaller gear than it was to perform fewer with a larger one. The general recommendation is to use a gear that allows you to spin at about 80RPMs. This will allow you to maintain forward momentum with a minimal amount of incremental effort, ie like lifting 1kg 1000s of times per hour. This is what is known as the sweet spot. You’ll know you’re in the sweet spot when it feels as if you’re able to maintain crank momentum simply with the inertia of your foot moving through the dead-zone with minimal power being applied in the down stroke. Over time and with a bit of experimentation, you’ll come to know each gears sweet spot. Do know that your ability to spin larger gears will get better as you get fitter and stronger. For example, moving from a 44x18 to a 44x15 at 80RPM would see your speed increase from just under ((44/18)2.28060/1000) 26km/hr to about ((44/15)2.28060/1000) 31km/hr. It takes a certain amount of extra power to spin the 44x15 but once you have that power, the extra speed will be very satisfying.
Do Crank Arms Matter?
A crank arm is a lever, another simple machine. As is the case with any lever, the farther away from the pivot point, the less force you have to apply to move a load. With a crank arm, this distance is measured from the middle of the pedal to the middle of the axle. How long can a crank arm be? That is dependent on how long your leg is. One can mess with the geometry of the bike to be able to take advantage of very long crank arms but at some point it won’t be comfortable to pedal as it will require far too much bend in the knee. The range for crank arm length is 165 shorter people and 175mm for taller. A length of 170mm is common for an average sized person. Does this have an effect on gear ratios? Absolutely! But before we do this, let’s consider the effects of crank arm length on power.
Power applied to forward motion is the product of the force applied to the pedals times crank, the crank arm length and the cadence. The force applied to the pedal times the crank arm length is torque. For a constant power output, the variables are; higher cadence, lower torque or, lower cadence, higher torque. Higher torque can be achieved with more force on the pedal or a longer crank arm. Now lets see the effect by applying this to the gear ratio chart above using both a 165mm and a 175mm crank arm length.
| Crank Arm Ratios | 22 (165/175) | 32 (165/175) | 44 (165/175) |
|---|---|---|---|
| 34 | 1.373/1.294 | 1.996/1.882 | 2.745/2.588 |
| 30 | 1.556/1.467 | 2.263/2.133 | 3.111/2.933 |
| 26 | 1.795/1.692 | 2.611/2.462 | 3.590/3.385 |
| 23 | 2.029/2.005 | 2.951/2.783 | 4.058/3.826 |
| 20 | 2.333/2.200 | 3.394/3.200 | 4.667/4.400 |
| 18 | 2.593/2.444 | 3.771/3.556 | 5.185/4.889 |
| 15 | 3.111/2.933 | 4.525//4.267 | 6.222/5.867 |
| 13 | 3.590/3.385 | 5.221/4.923 | 7.179/6.769 |
| 11 | 4.242/4.000 | 6.171/5.818 | 8.485/8.000 |
While the longer crank arm length may only provide a 2-3% advantage, it can also be used to accommodate the use of different sized chain ring/cog combinations and this might offer you better comfort.
What about Hills?
Gearing allows us to flatten out a climb. You want to expend the same amount of power on a hill as you would on the flats. To do so means you need to find a gear where you can spin. In reality, the spins on a hill will likely drop to about 60 and that’s ok. One of my favorite rides involves sections that are 13% and 15% grades. On those sections I often shamelessly drop to my 22x34 to keep it at 60rpms. Doing the maths, that is 0.647 * 2.2m * 60 rpm * 60 minute/hr = 5.1 km/hr. Yes, sometimes people are walking beside me at the same speed as I’m climbing. And I even once had a runner blow by me on the 15% grade which I found to be very impressive. I could use a larger gear but that would require me to use more force on the pedals and cause me to lose control of my breathing. All this would would compromise the rest of my ride so I’d prefer to stick to the smaller gears.
One other technique that is important especially when climbing is the ability to pedal efficiently when out of the saddle. This is incredibly useful when you are in rolling hills where the downs give you enough momentum to stand up to get over the top of the next rise. It’s also useful on the longer climbs as it lets you change the angles which can help rest some muscles on the climb. On my favored rides the climbs have a few short steep sections where standing on the pedals makes things easier.
Shifting Gears
As you’ve might have concluded, I will, very quickly, shift gears to cope with changes in wind speed or road gradient in order to maintain an optimal cadence. But I’ll also sometimes decide to grind it out in a gear that is maybe just a bit too big for me for the conditions when it’s advantageous to do so. Just know, if you do decide to grind, you’ll likely suffer later as the exertion will result in micro-tears in the muscle tissue which can result in mild swelling and muscle pain 24-48 hours after the ride.That said, the benefit to occasional grinding it out is that it can help to improve your power and helps your muscles adapt to the strain. Just make sure you plan either for a rest or light movement day after a hard ride as this will help with the repair. You may find this webmd article on the subject helpful.
Now, get out and ride!!!
There is so much else that could be said about bikes, setup, technique, and so on. That said, I think I’ve covered a fair portion of the basics which I hope you’ll find helpful. And don’t forget, the main purpose of cycling, aside from improving your fitness level, is to simply get out and have some fun. It’s not very much fun when you’re uncomfortable on your bike. Getting the bike properly setup with the right sizing and right gear ratios for the area you live and your current strength and fitness level is the first step in improving comfort on the bike. Next, working on your pedaling technique will go a long way to improving how you feel when you finish a day in the saddle. And with that, I’m out of here to have some fun on one of my favorite rides. Happy trails!